How to Create a Point of Sale Invoice and Process Payments in Sage X3 POS Solution
What sets Sage X3 Point of Sale (POS) solution apart is its interactive features that enable store locations to create invoices, collect payments and access real-time inventory. In this blog, we’re going to walk through how to create a POS invoice and how to process a payment in Sage X3 POS, giving you helpful tips so you can take full advantage of the benefits of the solution. As a web-based browser experience, this solution offers real-time data and information, making it a powerful tool for its users.
For this specific example, we’ll create an invoice for a customer buying a product and paying in cash. The guide has been split into two steps: creating the invoice and processing the payment.
Step 1: Creating a POS Invoice
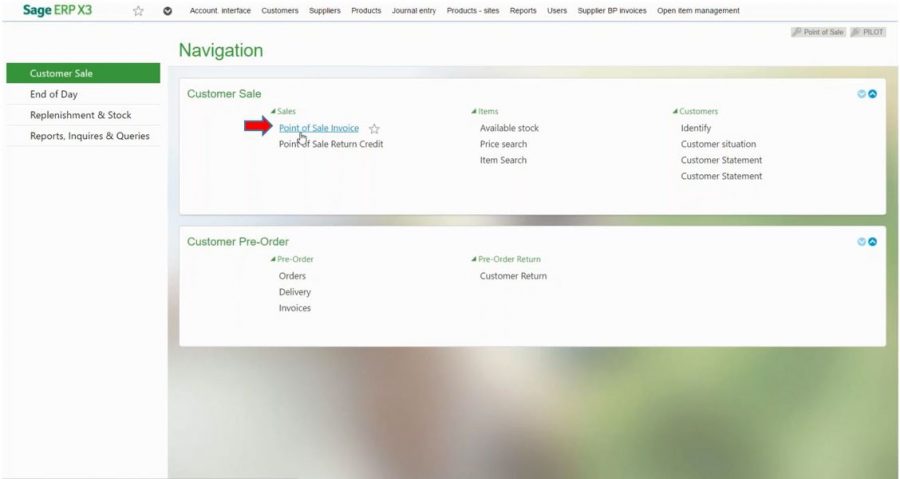
1. To create an invoice you start from the Navigation screen, and under ‘Customer Sale’ select ‘Point of Sale Invoice’.
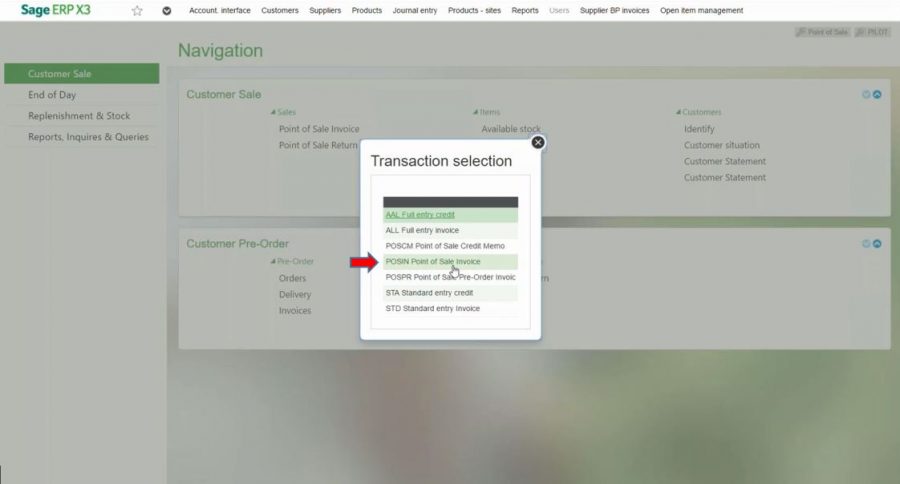
2. Select ‘POSIN Point of Sale Invoice’ from the pop up box that appears.
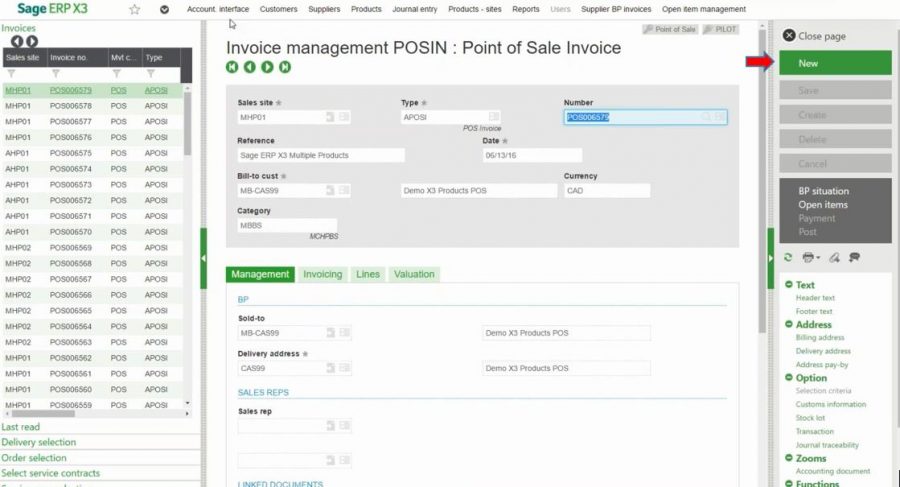
3. From this screen, all existing invoices can be easily accessed on the left hand side under ‘Invoices’. Since we’re creating a new invoice though, select ‘New’ from the menu on the right.
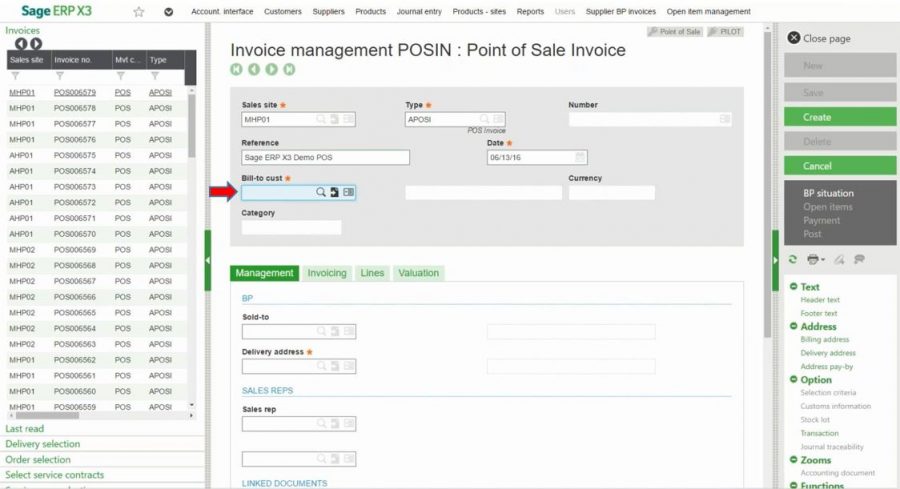
4. For ease & speed, you can set up default settings based on each user such as the Sales Site (i.e. location) or Type (i.e. type of invoice). In the ‘Bill-to cust’ field, select the customer by manually typing the name in or clicking the magnifying glass to select from a list.
Added bonus: If it’s for a new customer, no advance set up is needed – just type their name into the ‘Bill-to cust’ field and you’ll get an automatic pop-up to fill in their information without leaving your new invoice.
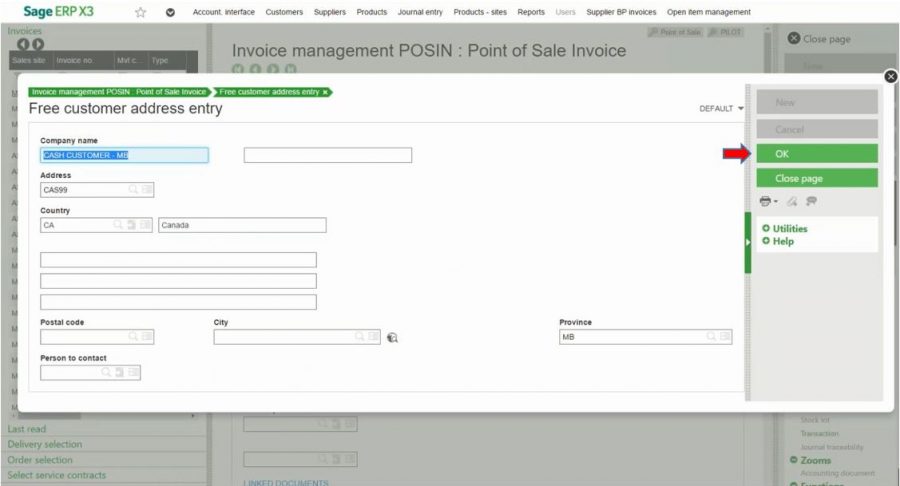
4A. If you’ve entered a new customer into the ‘Bill-to cust’ field, you’ill be directed to the following screen where you will be asked to enter in the customer information as you want it to appear on the invoice. Once you’ve entered in the information select ‘OK’ to go back to the invoice you were working on.
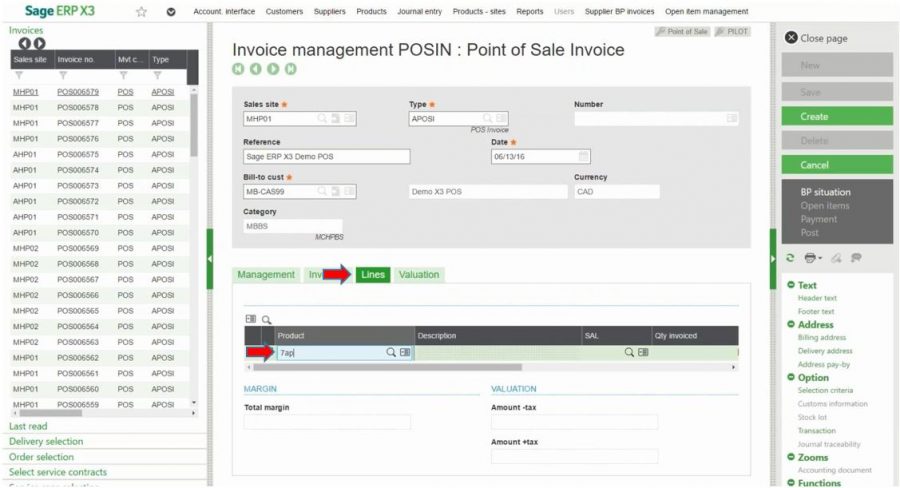
5. Once you’ve filled in the required fields (marked with an orange star), go into ‘Lines’ to add the product(s) being sold. You can use a standard PC wedge scanner to scan the product or manually enter the product by searching the product name and hitting ‘enter’.
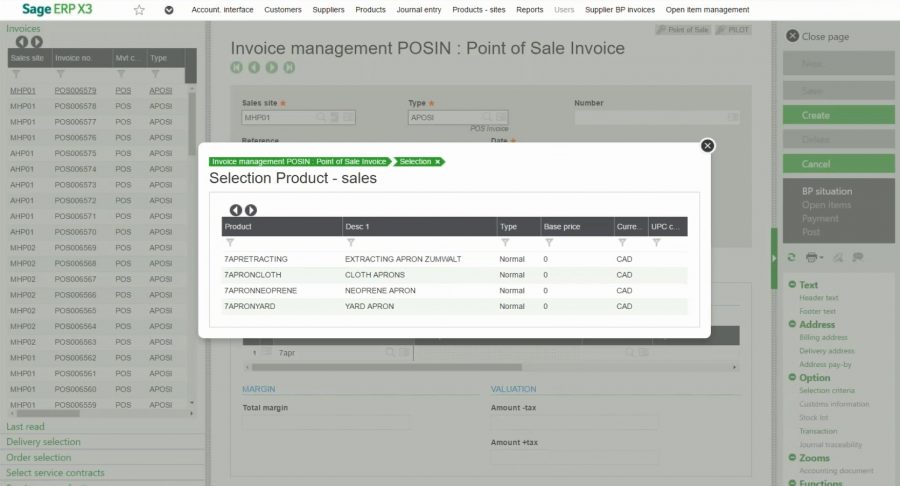
When manually entering products, do a quick search by typing in the first 3 letters of the required product (as seen in this example), or click the magnifying glass to bring up a complete list. This will open up a pop-up window with a list of the products that match your search term.
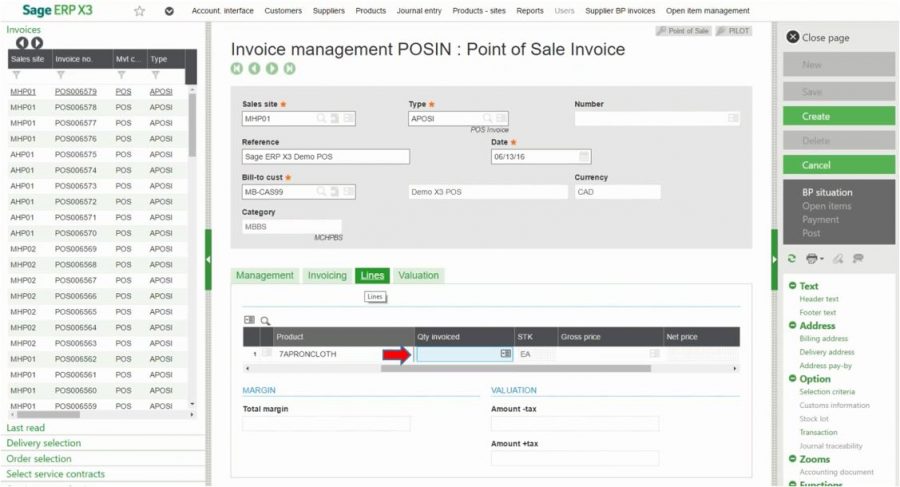
6. In the pop-up product list, double click the required product to select.
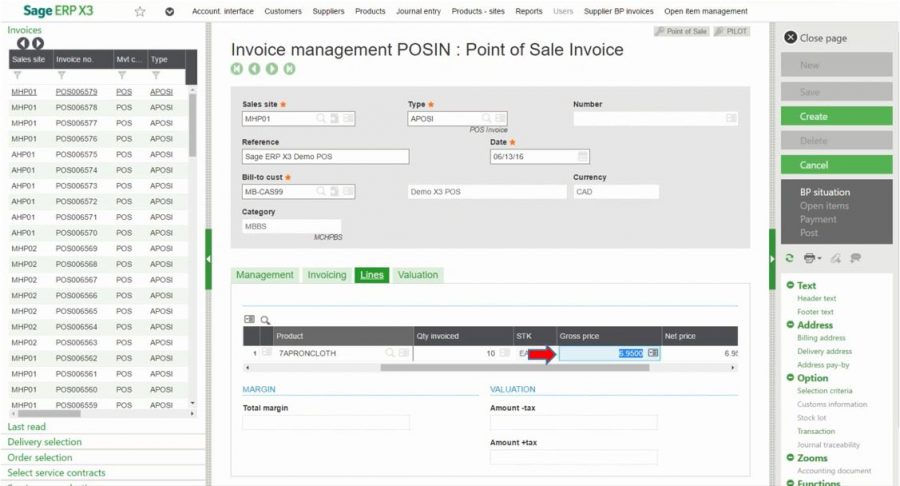
7. Enter the quantity being ordered, for example 10.
8. If the gross price hasn’t been pre-entered for the product you selected, add the appropriate price. Note that the gross price is the price of the product before deductions.
Added Bonus: The ‘Gross Price’ field is a lockable field, so supervisors/administrators can decided which users have the ability to adjust the price at the point of sale. To save time and improve accuracy, we recommend pre-entering prices for as many products as possible, so the correct prices are automatically added when users select products while creating a POS invoice.
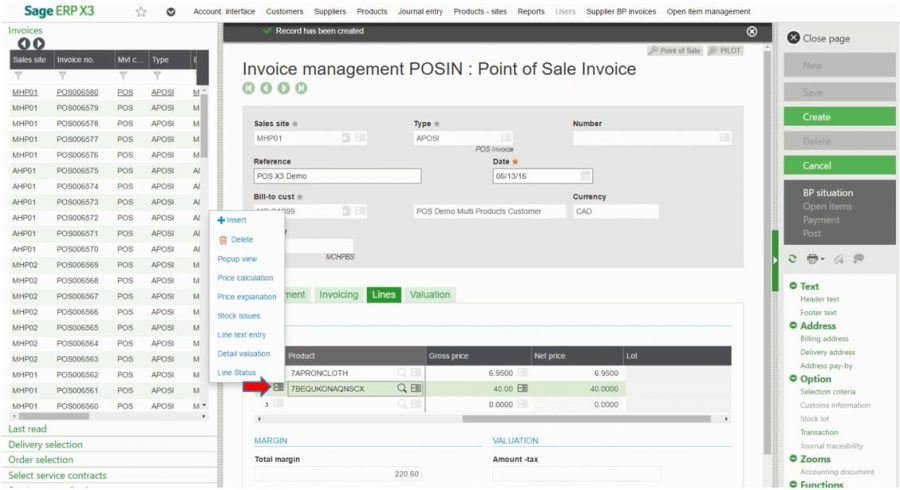
To add another product, click enter to move down to the next line.
9. If you require more information about the product, such as stock issues or price explanation, click the action icon on the far left of the line item to open a menu and access additional options.
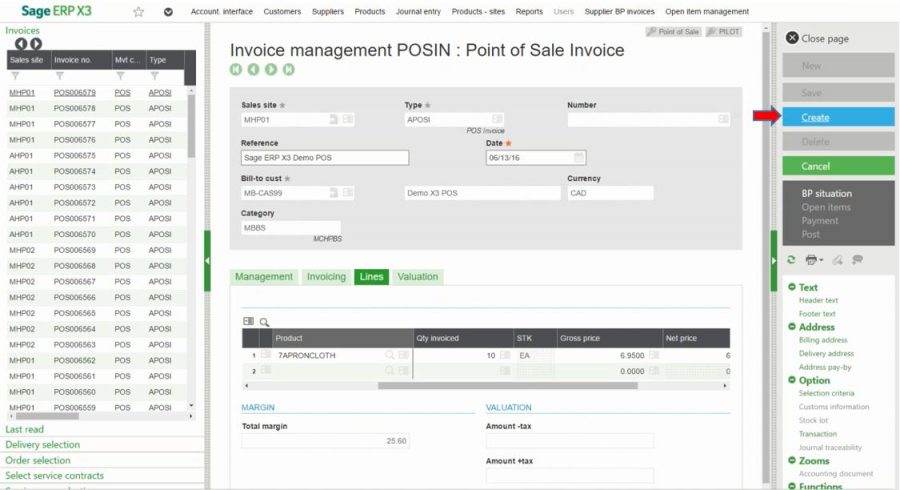
10. When all required items have been scanned or manually entered into the invoice, select ‘create’.
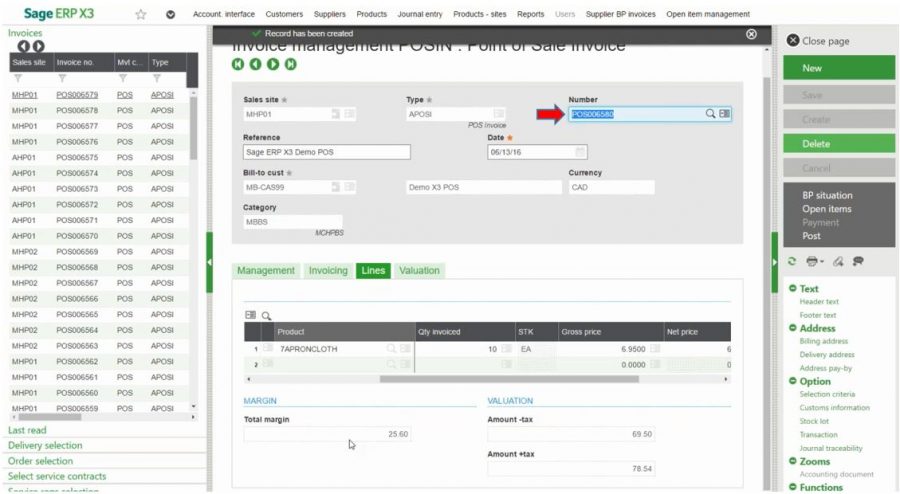
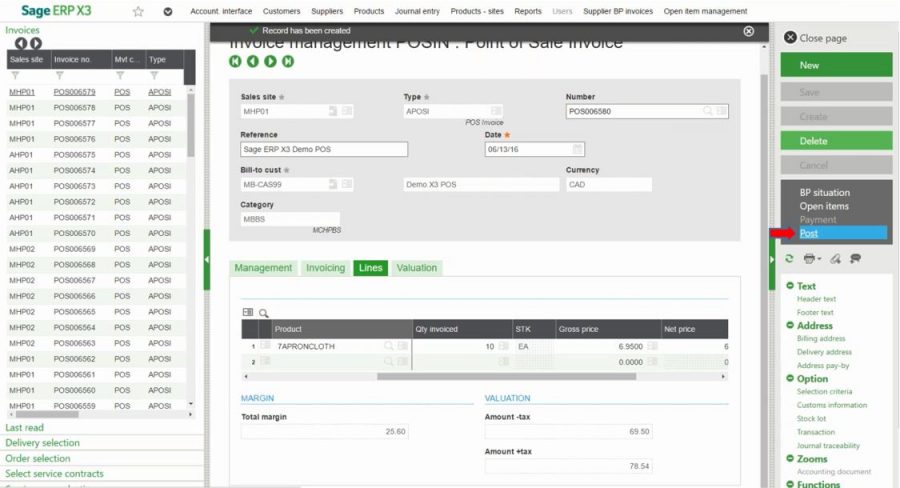
11. Once created, you can see the overview of the invoice. The invoice has now been assigned a reference number.
12. Final step – send the invoice to your accounting division by clicking ‘Post’
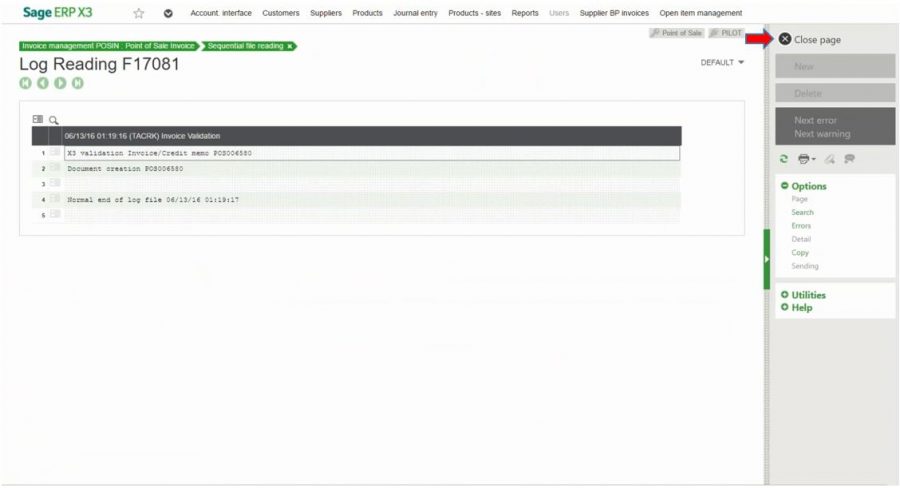
13. You’ll now be directed to the following page, confirming that the transaction was posted, and you’re done! Just click ‘Close page’.
Step 2: Process the Payment
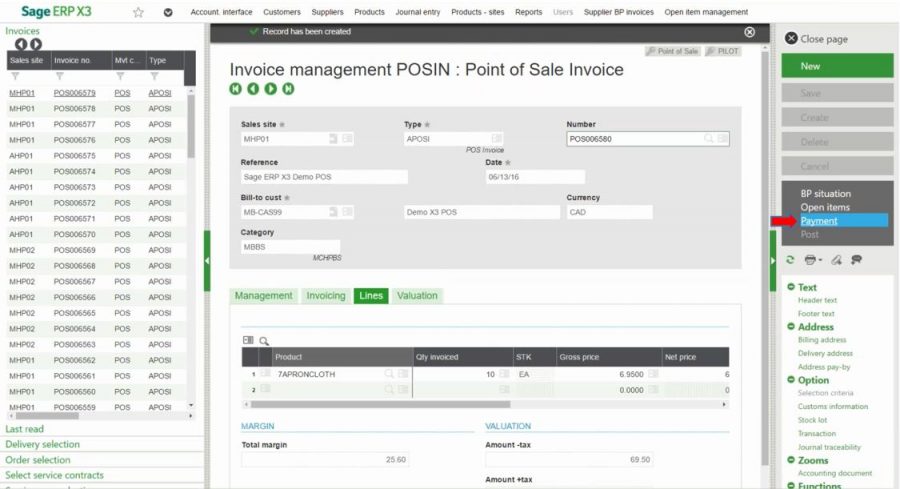
1. Select the required invoice from the invoice panel on the left and click ‘Payment’ to receive payment from the customer.
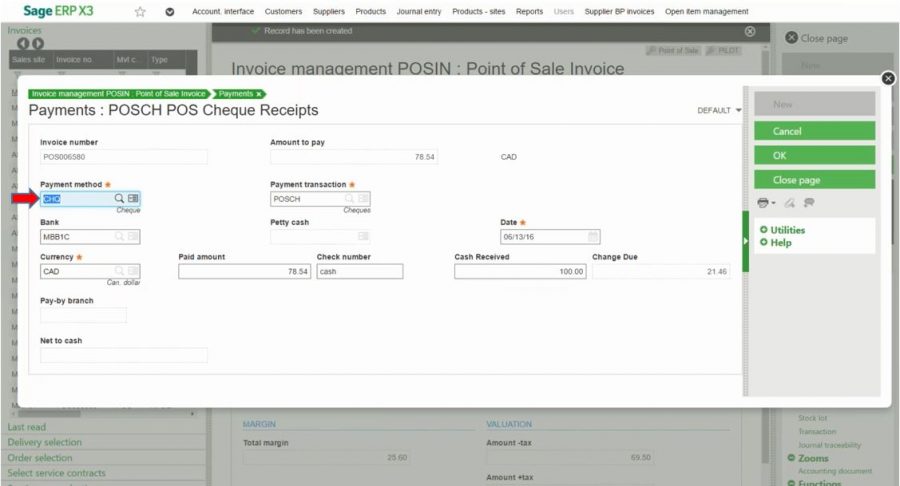
2. Enter the required information (indicated with *) in the payment window that pops up. In this example, the client is paying in cash, so cash has been selected under ‘Payment method’. Use the magnifying glass in each field to access a list of your available options.
Added Bonus: When dealing with cash the system automatically calculates the ‘Change Due’ when you enter in the amount of ‘Cash Received’.
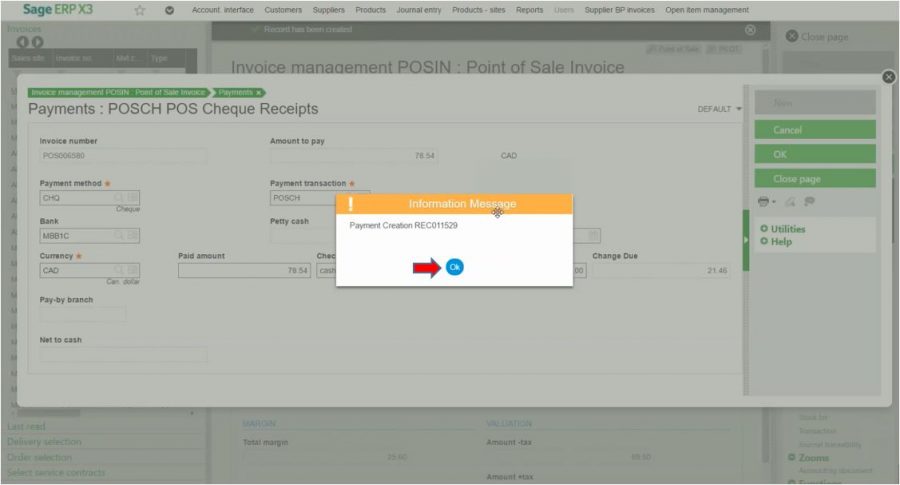
3. Click the green ‘OK’ button to confirm the payment once all of the required information has been entered. The following pop-up confirms that the payment was successfully created. Click the blue ‘OK’ bottom to proceed.
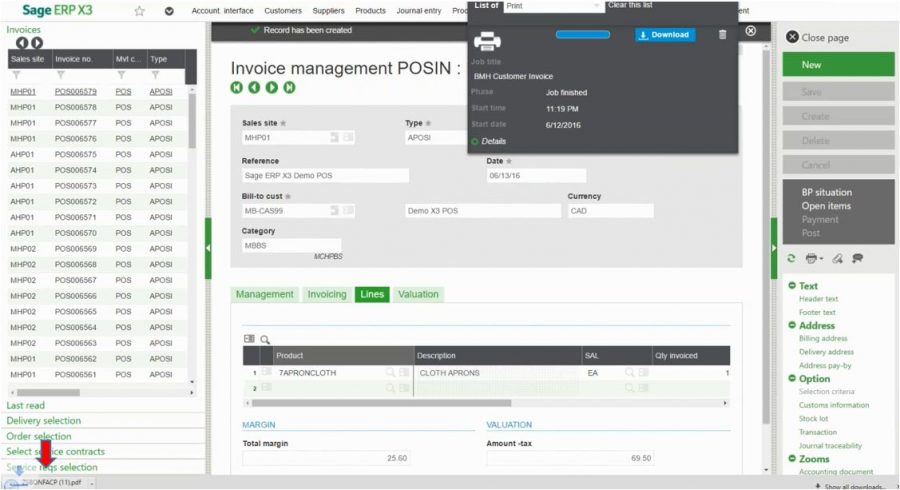
4. The invoice will automatically generate a digital receipt for the customer, which can be found in the download folder. When using Chrome, a shortcut to the download can be accessed on the bottom left-hand side of the screen.
Added Bonus: To save time, you can set up preferences so that digital invoices are automatically sent to customers when an email address is provided, or that a hard copy of the invoice is automatically printed.
Congratulations, you’ve successfully created a POS invoice and processed the payment! That was easy wasn’t it? Follow these steps to enter any POS invoice and process payments, adjusting details such as location, currency or payment type to correspond with the sales transaction you are completing. Remember to take time to set up features in Sage X3 POS such as pre-entering prices and automatically sending/printing invoices to save time at the point of sale.
For more tips go to the ‘Tips and How-To’ blogs.

