
How to Customize Opportunity Fields in Sage CRM
Sage CRM (Customer Relationship Management) is designed to suit the needs of both small and medium sized businesses, allowing them to optimally track and retain customers. One of the key features making this CRM a valuable tool across the company is its ability to track not only current customers but new opportunities so everything multiple departments need to know is convenient and easy to access.
To make sure it’s specific to your business, you can use built in customization features such as field editing to adjust opportunity tracking. In this example, we show how you can customize the ‘Source’ field. When tracking an opportunity the Source field indicates where the opportunity came from, such as website, telemarketing, referral, or e-mail, so you can know where to put more sales & marketing efforts in the future.
You can follow these same steps to customize any of the fields that will track the information most valuable to your business.
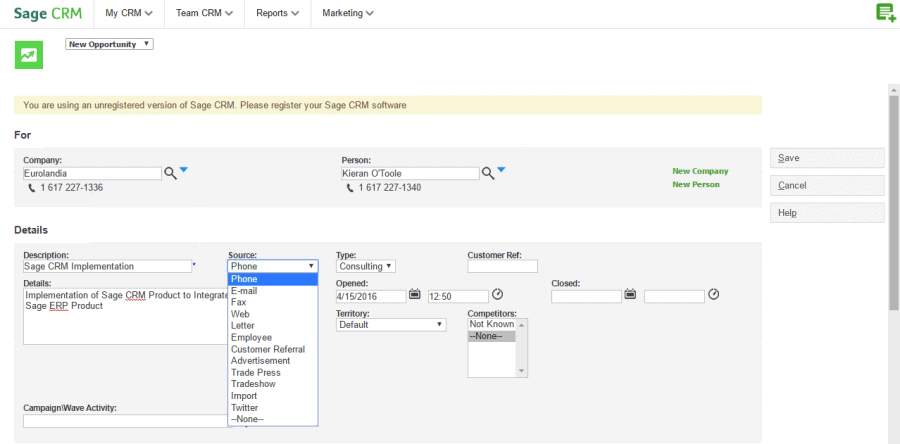
1. As shown below, the default ‘Source’ field includes a wide range of sources to choose from. It may be the case that the field includes sources that you aren’t using and is missing sources that you need.
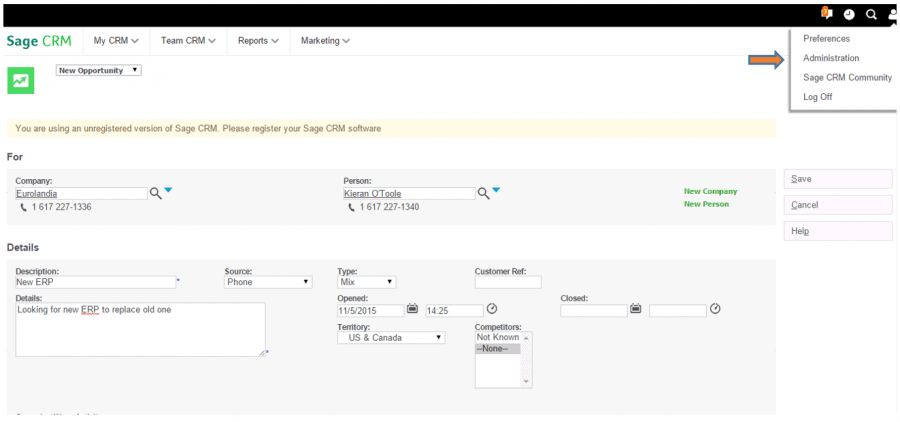
2. The first step to adding new field options would be to go to Administration from the ‘Profile Icon’ at the top right of your screen.
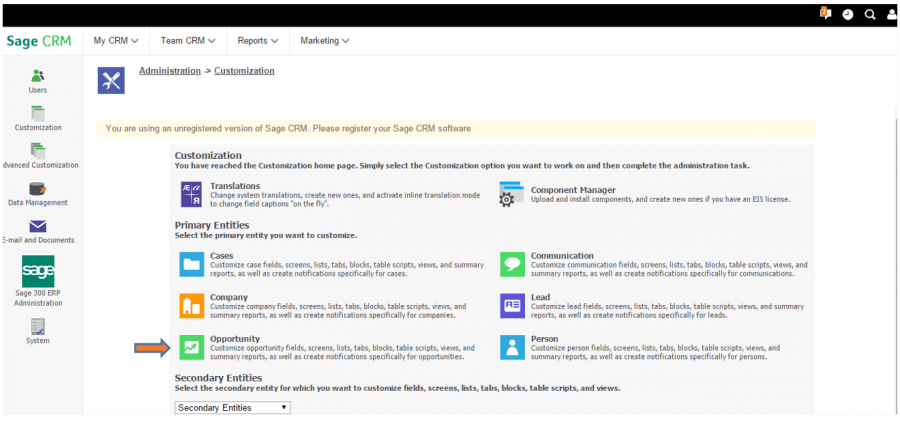
3. Once in the Administration screen, click on the Customization option.

4. Once in the Customization screen, click on Opportunities.
5. Once in Customization for Opportunities, scroll to Source and click on the edit (Pencil) icon.
![]()
6. Follow these steps to customize the Source Field:
Step 1: Enter the sources ‘Name’ then ‘Code Name’ below. Note, the code name cannot contain spaces. The ‘Name’ is what will appear in the drop down list while the ‘Code Name; is the system’s way of tracking it.
Step 2: Click Add
Step 3: The newly added fields will show in the Selection box.
Step 4: If there are sources in the list that you never use (e.g. fax), select the unwanted source in the Selection box and click delete to remove it from the field list.
![]()
7. Re-organize Sources and Save
Step 1: Use the blue arrows to organize the source options (i.e. alphabetical, most commonly used at the top, etc).
Step 2: Click Save for the changes to take effect.
![]()
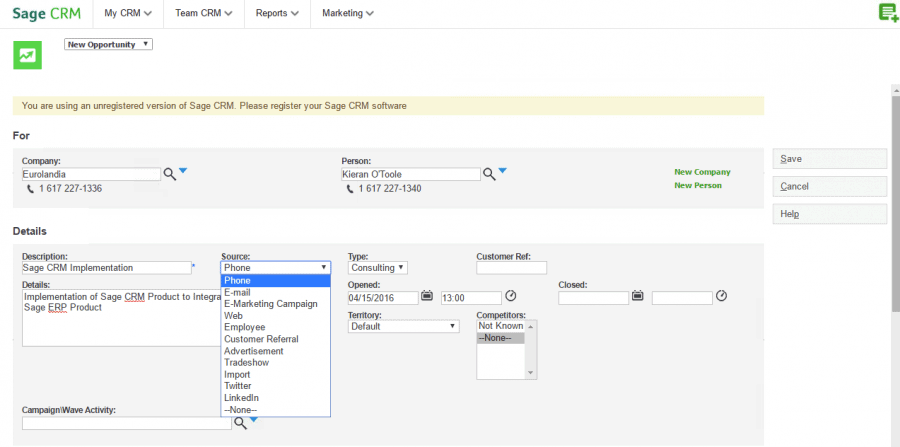
8. The customized sources are now displayed in the Source field.
Congratulations, you’ve just successfully customized the source field for your opportunities and didn’t even have to call for IT support (hopefully). Follow these steps to customize other fields such as ‘type’ or ‘competitors’ to improve Sage CRM as a tool for your organization. For more tips, visit our ‘Tips and How-To‘ blogs.