
How to Set Up and Leverage User Dashboard in Sage CRM
A good CRM system offers users the ability to customize and set up a dashboard that helps get the job done for each role within Sales, Marketing, or customers service, as is the case with Sage CRM. Across all industries, growth can be attained through increasing sales. A CRM system provides the structure, the base, or the foundation for a company’s sales process through the customer lifecycle. From delivering and tracking marketing efforts during the buyer’s journey, to closing a sale, all the way through to supporting customers with consistent customer service
A CRM software system helps companies manage customer relationships in an organized way, while tracking customer and prospect interactions in a single centralized place. If you were a superhero, it would be the toolbox of gadgets and intelligence you would access to be fully prepared before you went on a mission. Like a superhero’s armour and recon intel is designed for his or her needs, you would want your toolbox to be customized and configured for yours.
The Dashboard in Sage CRM
The dashboard in Sage CRM has been developed to lay out the information you need in the way that best suits your needs and processes. Sales and customer relationship processes can be complex, involving many activities and dependent on a variety of information and gadgets. Some of these activities include:
- Managing the sales funnel from a new lead to close,
- Communicating with customers for cross-sell activities,
- Deploying track-able online and offline campaigns such as emails,
- And managing customer service activities such as support tickets.
Depending on your role within the company, the processes you are involved in may differ, so it makes sense that the dashboard can be customized to present whatever information is useful for your daily activities. In this way, each user of Sage CRM can personalize their experience, highlighting the information and graphical workflow processes crucial to perform their job.
If you are a sales manager, you may want to ensure that monthly targets, current opportunities, and target locations of prospects are prominent in your dashboard. If you are a customer service representative, your dashboard would feature outstanding support tickets, pending communications, and so on.
Setting up an interactive dashboard in Sage CRM’s intuitive user interface is simple and easy.
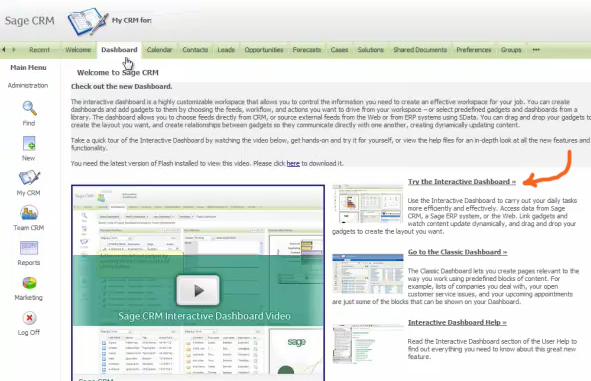
| 1. “Try the Interactive Dashboard.” |
| On your first time visiting the dashboard section of your Sage CRM solution, a welcome screen will greet you and one of the options presented will be for you to “Try the Interactive Dashboard.” This will bring you to where you can begin setting up your first dashboard (assuming one hasn’t been assigned to you by the system administrator). |
 |
| 2. “New Dashboard” |
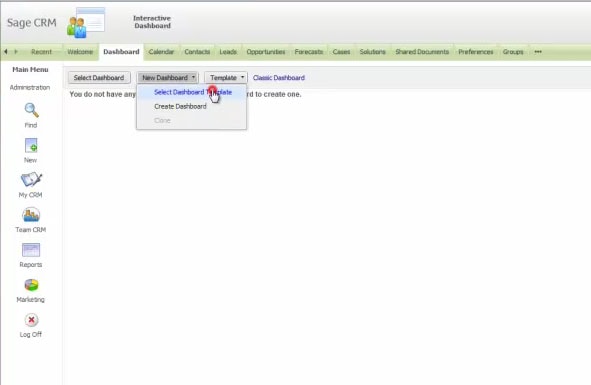 |
| From there you will be brought to a blank screen where you will have the option to create a “New Dashboard” and more specifically, one from an existing “Dashboard Template.” Selecting the “Dashboard Template” option will bring you to a menu where you can choose from the different pre-defined dashboard options. |
| 3. Sales Dashboard |
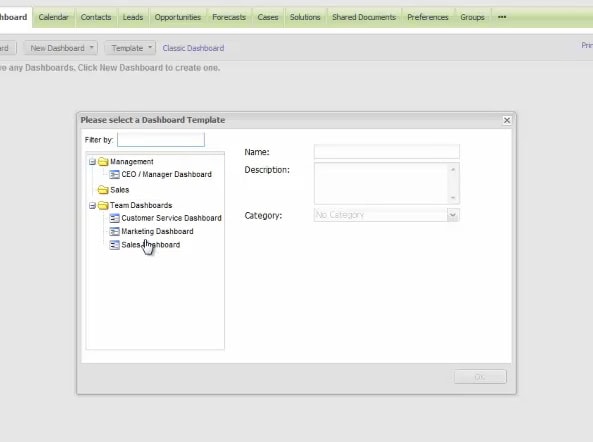 |
| For this example, we will pick the Sales Dashboard, but choose the one that best applies to your role. |
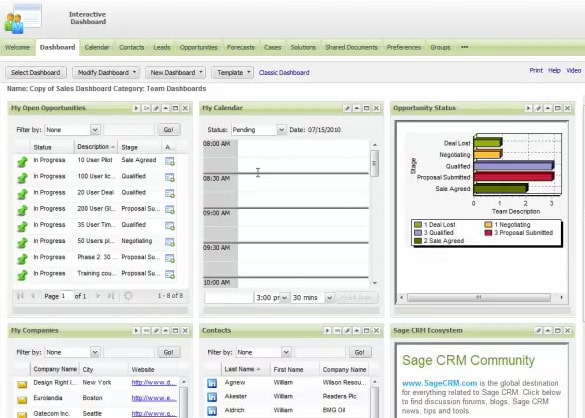
| 4. Sales Dashboard Gadgets for Sage CRM |
| The sales dashboard populates various blocks of sales related information and processes. These blocks of information within Sage CRM, are called gadgets, like for example “My Open Opportunities” which lays out all in progress sales opportunities. Gadgets can be further customized or changed for other gadgets, and where applicable, have search functions within the gadget so that users can find the specific information they need. |
 |
| 5. Sage CRM Workflow Features |
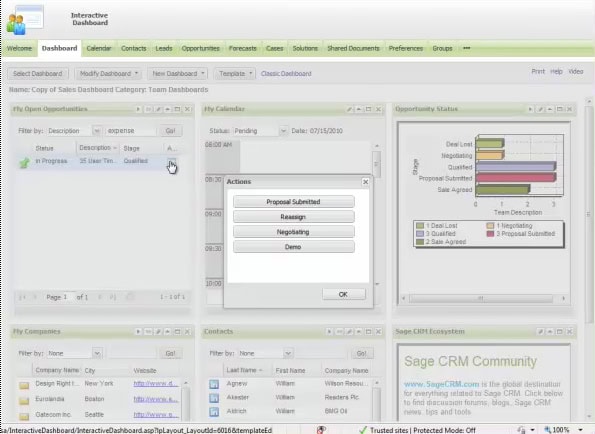 |
| For many processes, the gadget does not only present the information in question, but also allows for actions to be taken directly from the dashboard (through Sage CRM’s Workflow features). For example, by clicking the workflow icon (on the far column of the open opportunities list), you will be presented with the possible actions you can take on that item. |
| 6. Schedule Task Right from Sage CRM Dashboard |
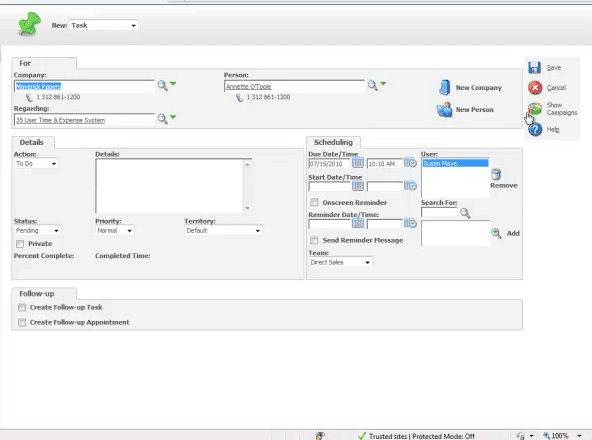 |
| Additionally, if you click on the task icon (the green pin on the left column of the Open Opportunities list), where you can schedule a task for that opportunity, right from the dashboard. |
| 7. Opportunity Status Graph in Sage CRM |
|
|
| 8. Linking Gadgets in Sage CRM |
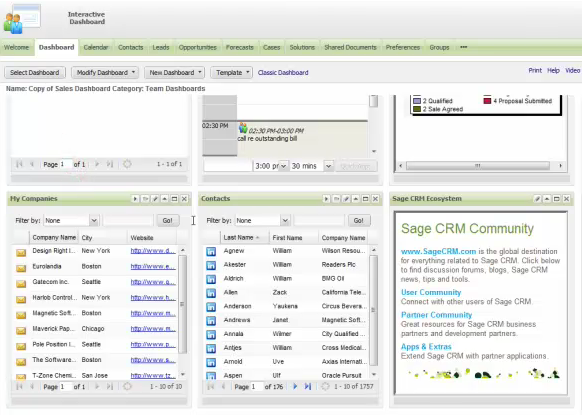 |
| Another important item to mention is that gadgets can be linked to one another. For example, on the bottom row “Companies” and “Contacts” are linked, meaning that when you select a company in one gadget, the contacts that populate on the other gadget are for the company selected. |
| 9. Add New Gadgets to Sage CRM Dashboard |
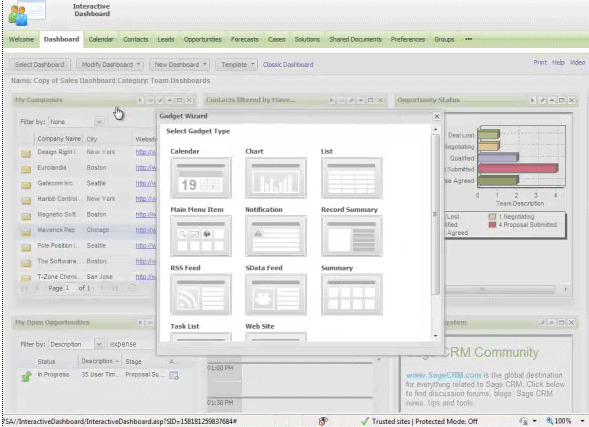 |
| You can add new gadgets by pressing “Modify Dashboard>Add New Gadget” will populate a wizard where all gadgets can be found. A last little bit of fun is that all the gadgets can be dragged and dropped into different areas of the layout, for ultimate personalization. |

To see these instructions in a slideshow format, visit our “How to Set Up Sage CRM’s Custom Dashboard” for a step-by-step guide on how to get started with your own Sage CRM Dashboard.