
Sage 300cloud Tips & Tricks Part 2: Use Security Options to Restrict User Access
In part 1 of this blog series, Modifying Your View, we outlined how you can edit fields and hide columns in Sage 300cloud (formerly Sage 300c) which showed you can modify your user view to suite your preferences and needs. In part 2 of this series, we will show how you can use security options to restrict user access to specific GL accounts or segments.
Restricting user access to accounts and/or segments gives you more control over your data and accounts, enhancing your security and ultimately allowing you to ensure the data in your system remains confidential and reliable.
This is a feature that most businesses either require, or would like to have, but many don’t realize it’s available and how easy it is to use.
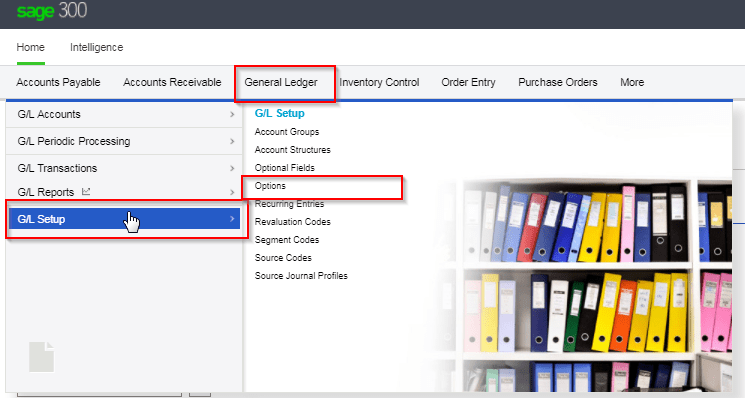
Step 1: From the Sage 300cloud (formerly Sage 300c) Home Menu, go to General Ledger > G/L Setup > Options.
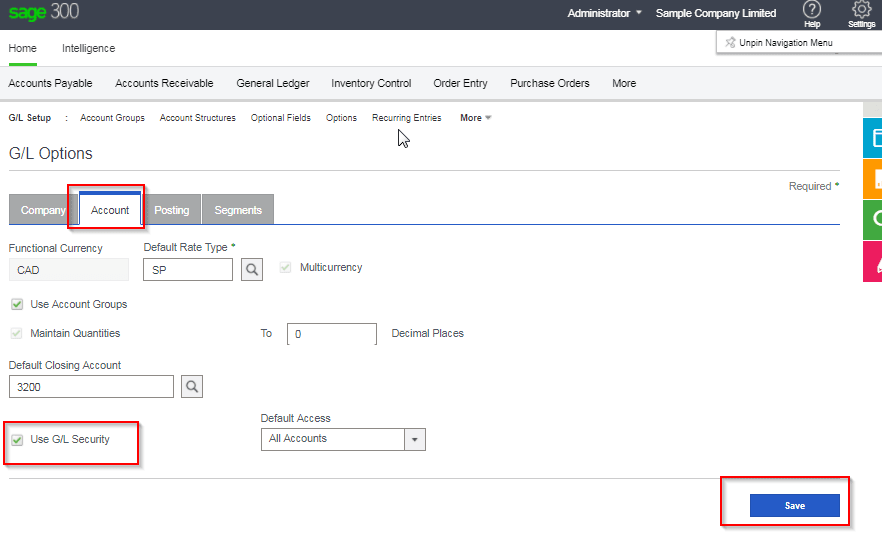
Step 2: Once in G/L Options, go to the Account tab and activate G/L Security by ticking the box labelled “Use G/L Security”. Click Save. To make the change visible you must refresh your account by logging out of Sage 300cloud (formerly Sage 300c) and then logging back in.
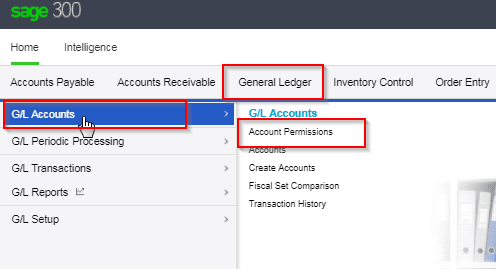
Step 3: Once you’ve refreshed your account, go back into General Ledger > G/L Accounts . In this section, select the new option available – Account Permissions.
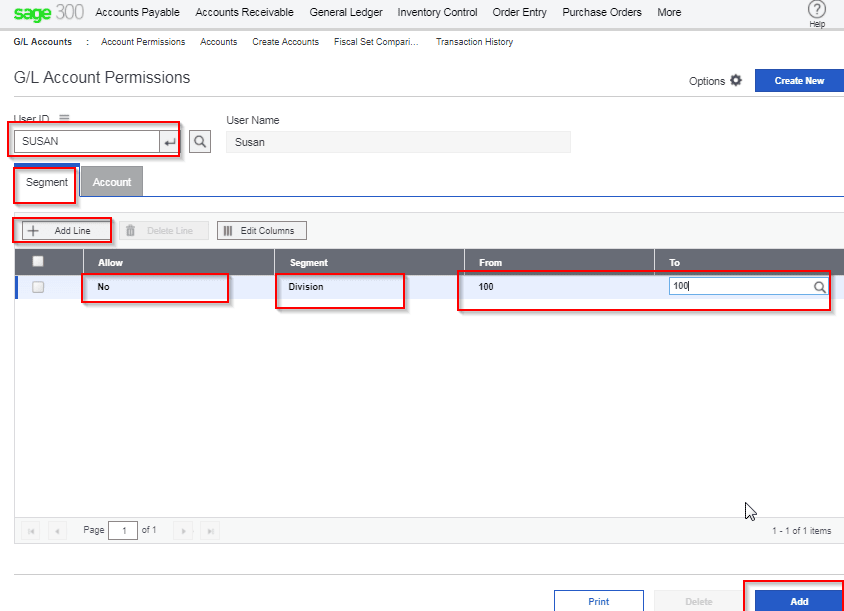
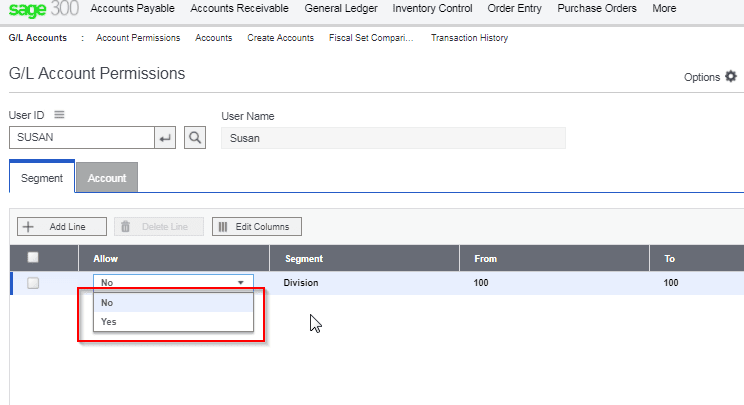
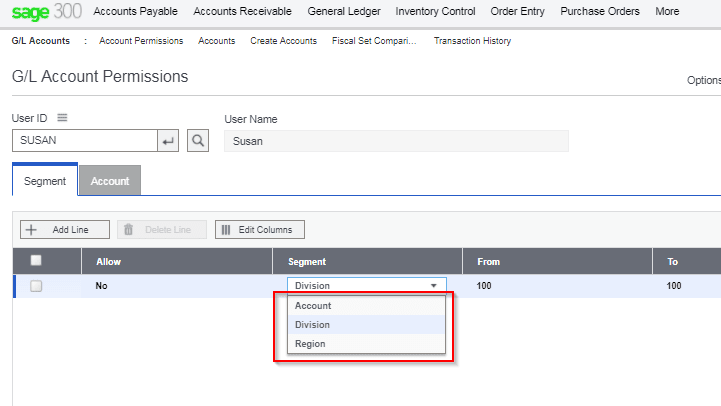
Step 4-a: Once in the G/L Account Permissions screen, under User ID (near the top of the section) select the user whose access you would like to restrict. To restrict a user (in this example Susan) from accessing a segment, select the Segment tab and click on Add Line to enter the restriction details. In this line you can use the drop down menus (shown in screen shots below) to specify whether or not to allow Susan access to the segment and choose the appropriate segment. You can also specify the segment range in the from and to fields. In this example we’ve restricted Susan from accessing the Segment Division 100 because that particular segment is managed by a more senior employee and she does not have the authority to access it. Once done, click Add in the bottom right hand corner to save the restriction.
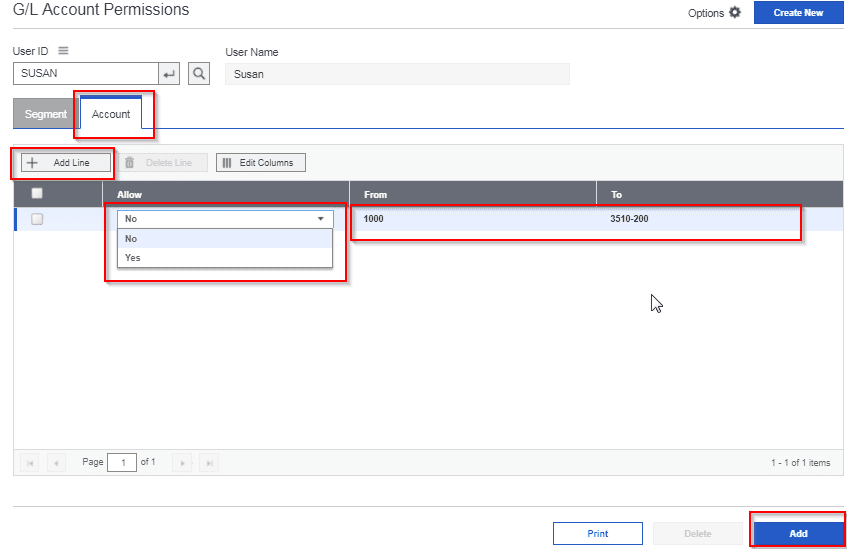
Step 4-b: You can also restrict a user from accessing G/L Accounts. In the same window, go to the Account tab, click Add Line, select ‘No’ under Allow and enter the range of accounts in the From and To fields. In this example, the user (Susan) is restricted from accessing Balance sheet accounts 1000 to 3510-200. Click Add in the bottom right hand corner to save the restriction.
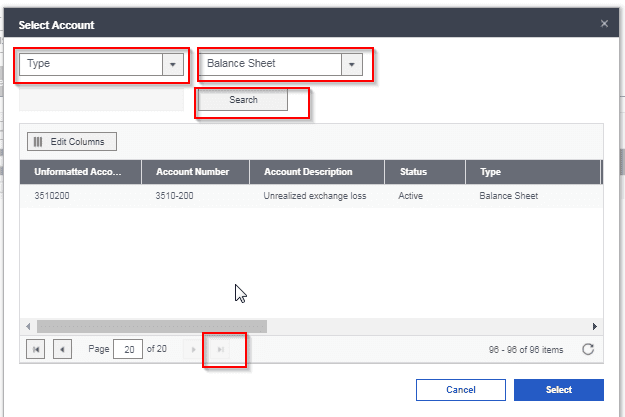
Note: If you don’t know the account range off the top of your head you can search the G/L Accounts by clicking on the magnifying glass in the search bar under To.
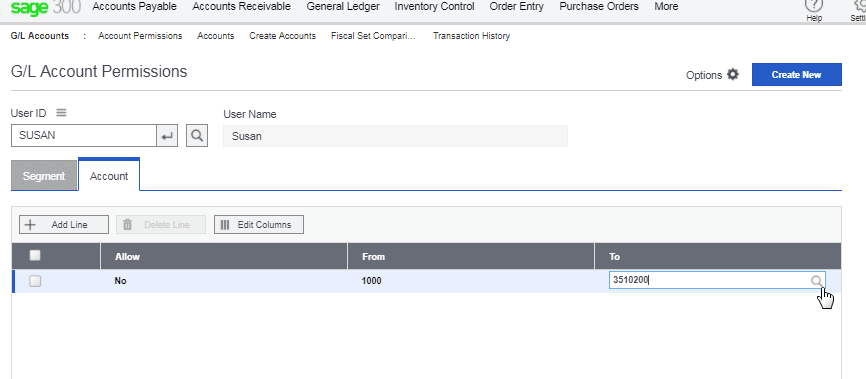
This will open up a new window (shown in the next image) that will allow you to filter your selection by choosing the Type. For this example, we’re choosing Balance Sheet. If you would like to restrict the user from accessing all the accounts you can click on the arrow next to the page numbers to go to the last page, select the last account and click Select.
Bonus Tip You can select a range that is greater than the accounts that already exist, so to avoid having to go in and update the system all of the time, select a large range that ensures that new accounts added are already included.
Hopefully you found this blog series of Tips & Tricks for Sage 300cloud (formerly Sage 300c) helpful! If you have more questions about how your business can utilize this feature, or questions about other areas of Sage 300 or Sage 300cloud (formerly Sage 300c), please feel free to email info@theanswerco.com. Of course, if you’re a client of The Answer Company, then your personal Account Manager can also help you with all of this.