How to embed Sage Enterprise Intelligence (SEI) into your Sage X3 (formerly Sage Enterprise Management)
Sage X3 (formerly Sage Enterprise Management) offers robust business intelligence (BI) and reporting tools as an ERP that give companies insight into their data, allowing them to make educated decisions and proactively improve their business. However, in some cases companies require enhanced BI functionality that goes beyond what’s offered within the ERP solution itself. Sage Enterprise Intelligence (SEI) enriches these features, enabling businesses to dive even deeper into their data. In this step-by-step tutorial, we’re going to show how analytics and reporting dashboards from SEI can be embedded directly into your ERP solution, Sage X3, making it even easier & faster for your team to see the information they need when they need it. Whether you’re actively trying to embed SEI dashboards into Sage X3 or simply looking to learn more about the solution, this should help!
Since SEI is designed specifically to work with Sage X3 (formerly Sage Enterprise Management), it has a similar interface making it intuitive, simple to use and easy to integrate. The URL for a SEI dashboard is needed in order to embed the dashboard into Sage X3, so we will start by showing how to find it. .
While there are a few steps to the process, embedding a dashboard will only take a couple of minutes, and ultimately may save your team hours on a weekly basis.
How to Find Sage Enterprise Intelligence Dashboard URL
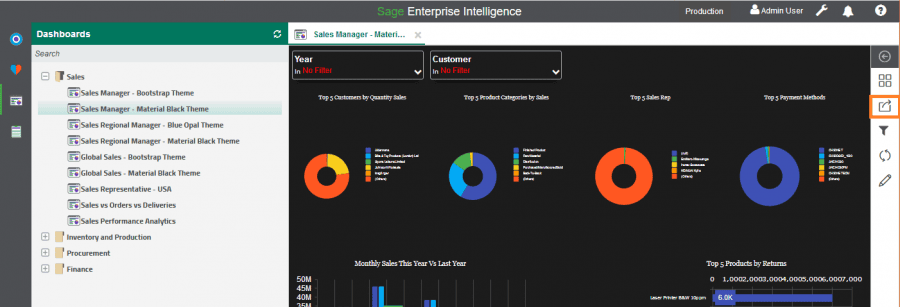
Step 1: Start by going into SEI and selecting the dashboard or report that you would like to embed into Sage X3. Once you’ve selected the dashboard, click on the sharing button in the vertical menu on the far right-hand side. For reference, see the share button highlighted in the orange box in the image below:
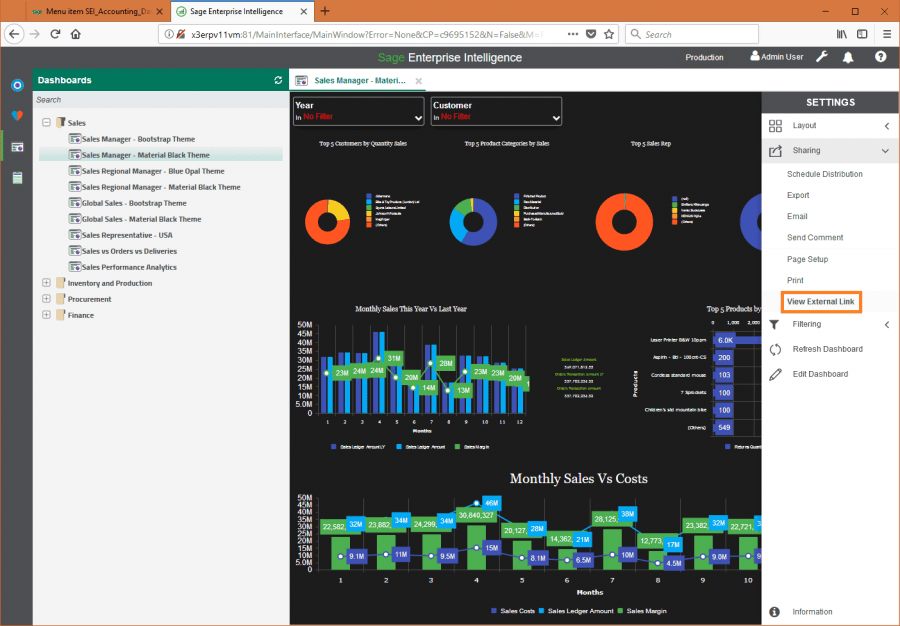
Step 2: Clicking the share button will expand the menu and open a dropdown menu under Sharing. From that menu, select View External Link which will update the URL in the address bar from your browser to the link that is needed to embed the dashboard into Sage X3. Be careful not to navigate away from the page before coping the URL, because that will change the URL.
Step 3: Copy the updated URL from the address bar of your browser to add into Sage X3.
Suggestion In case you want to copy anything else in between, we recommend pasting the dashboard URL into MSWord or Notepad for easy access in the next steps.
Adding SEI Dashboard to Sage X3
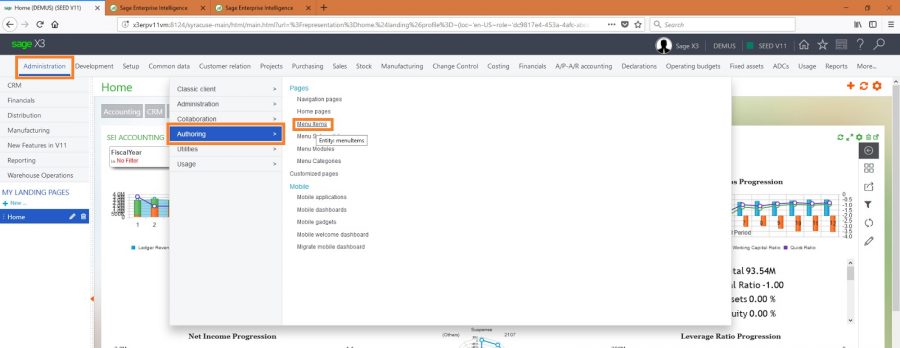
Step 4: Moving over to Sage X3 now, select Administration from the top menu bar. From the drop-down menu that appears, select Authoring and then Menu Items which will open the list of menu items for pages in a new window.
Step 5: When the list of menu items has opened, select the orange button that says +Create menu item from the action list on the right-hand side so we can get to adding that new SEI dashboard.
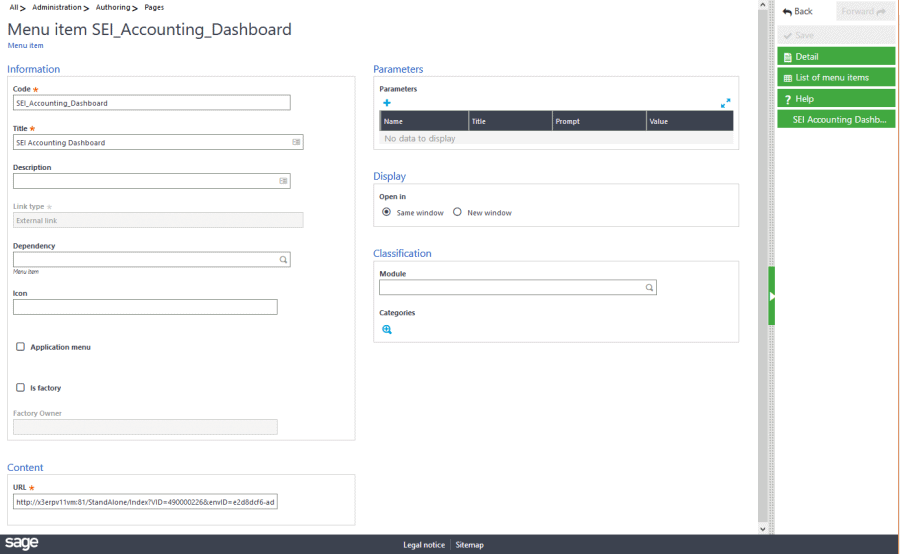
Step 6: This will open a window (as seen below) that will allow you to enter the key information for your new menu item, which in this case is an embedded SEI dashboard. Start by entering a code, essentially create a name without spaces, that will logically describe what the menu item is so you can easily find it again in the future if you ever need to make edits. For the purpose of this example, we are going to add an SEI dashboard for the Accounting Department, so we are going to call it: SEI_Accounting_Dashboard.
You will also need to enter a title. This should be clearly correlated with the code you just entered, and it should be user-friendly so you can add it to your landing page later. For this example, we have entered SEI Accounting Dashboard for the title.
Next, ensure that the link type is set to External Link. Finally, in the content section add the URL for the SEI dashboard or report that you want to embed. This will be the URL that you copied and set aside from part one.
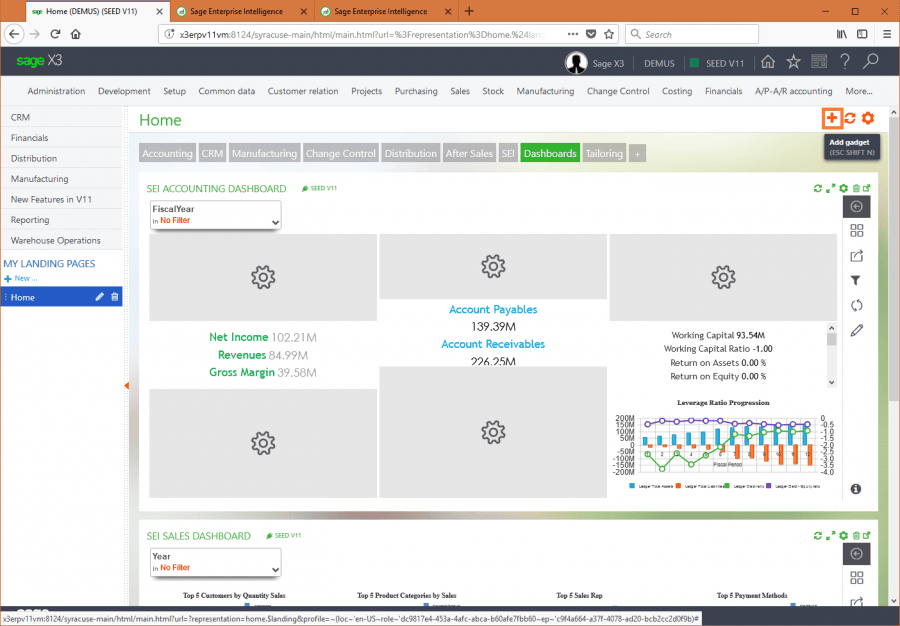
Step 7: The menu item you just created will now act as a gadget, so to gain access you will have to add it to a landing page. In your landing page, first make sure you are in the tab that you want to add the SEI dashboard to and then click the + in the top right corner to add the new gadget to that tab. For the purpose of this example, we are going to add the SEI dashboard to the landing page tab called Home, under the tab Dashboards. In your solution, you can create, name, and organize landing pages based on your preferences and add the dashboards where you see fit.
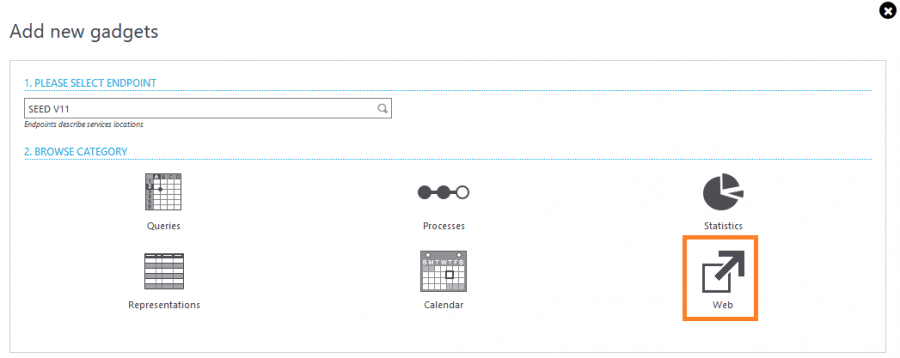
Step 8: Clicking + will open the following option menu, where you need to click on the Web icon.
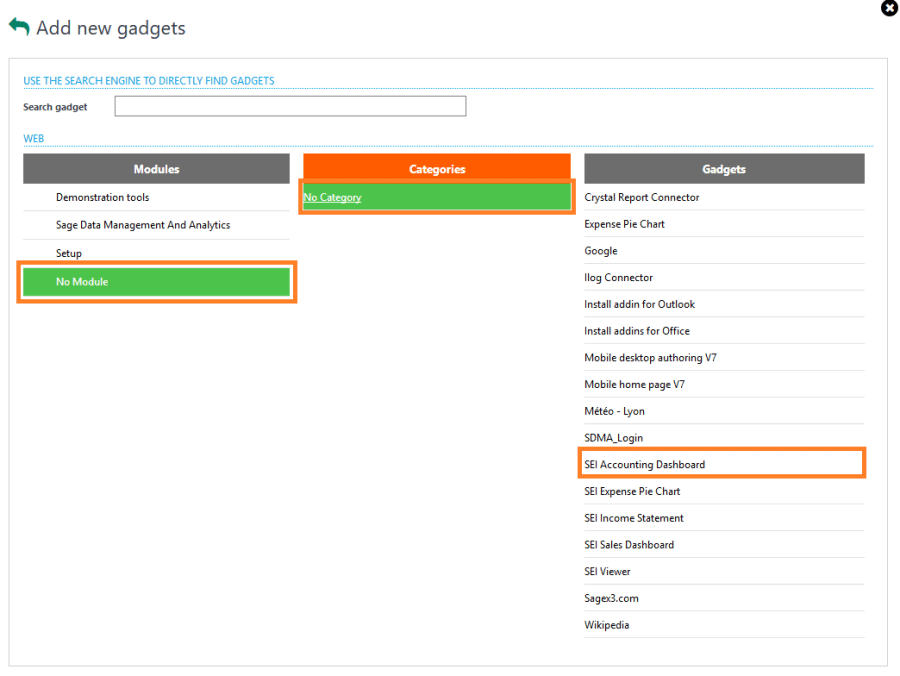
Step 9: Selecting Web will bring you to the screen below. Under Modules select No Module, under Categories select No Category, and under Gadgets select the menu item you just created, which in this example in SEI Accounting Dashboard. Selecting Web will bring you to the screen below. Under Modules select No Module, under Categories select No Category, and under Gadgets select the menu item you just created, which in this example in SEI Accounting Dashboard.
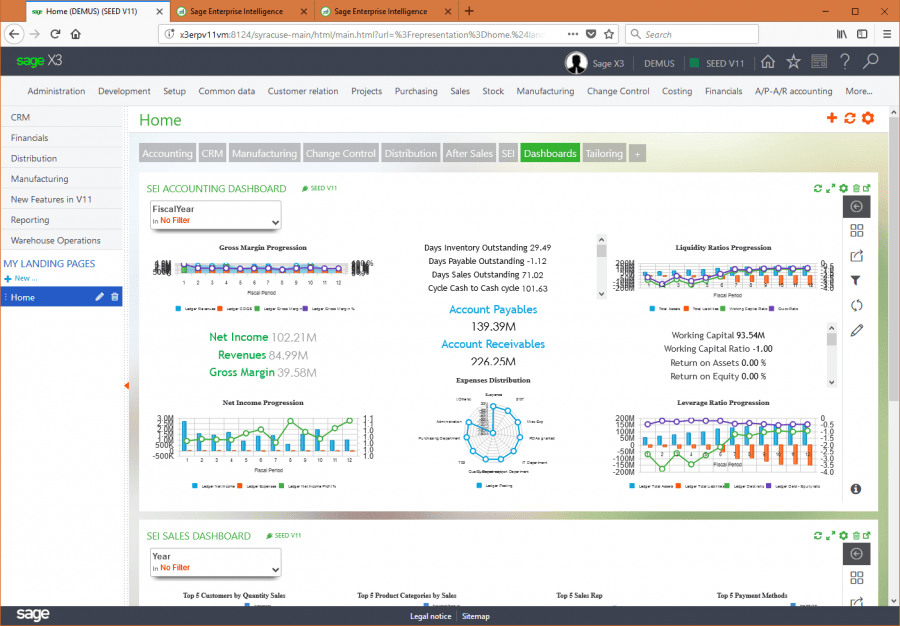
Step 10: When you’ve clicked on your gadget of choice, you will be redirected to the tab where your new dashboard has been added – ta da! If you want to adjust the size of the dashboard, just hover your mouse over the bottom border of the dashboard until a double-arrow appears and drag the dashboard until it is the size you want.
Now that you’ve done one dashboard, we highly recommend taking the few extra minutes to embed all of your relevant SEI dashboards into Sage X3 (formerly Sage Enterprise Management), giving you all the information you need in one place. These types of edits may seem small, but can make a big different to your entire team, and your decision making. If you’re curious about other ways to get more out of your current ERP or other complimentary solutions like SEI that could really help your business, that’s exactly where a business partner, like The Answer Company, can help with a technology review & discovery.
Already know what reports you want to include in your dashboard? Read our blog How to Create Dashboards in SEI to learn how to create your dashboard in Sage Enterprise Intelligence.

